How To Add TSA Precheck To Delta?

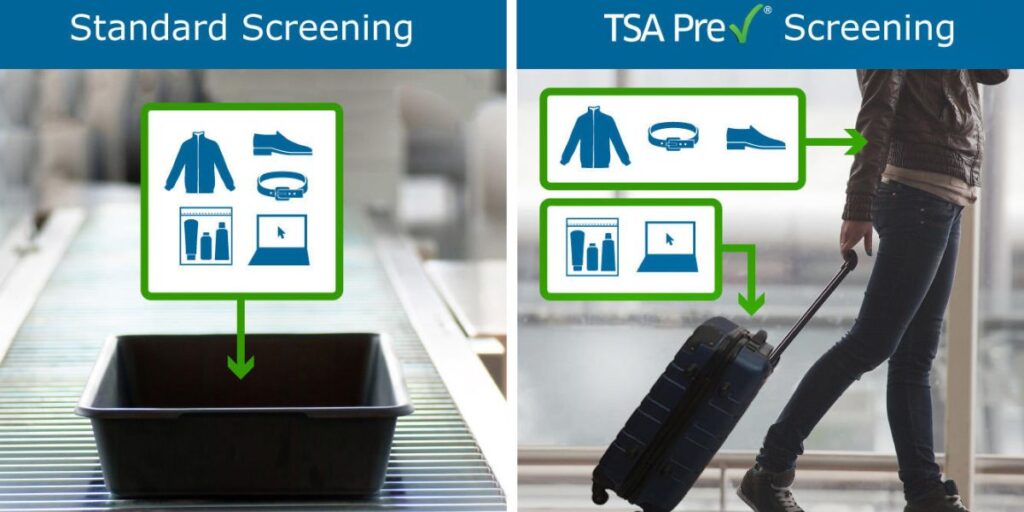
If you are a frequent Delta Airlines flier, you’re probably familiar with all the hassles of airport security and to save you some of them it is mandatory to know how to add TSA Precheck to Delta app. Experienced flyers know that enrolling in TSA Precheck makes the process faster and smoother. The program allows low-risk travelers to enjoy faster security screenings by skipping some of the more time-consuming parts of the process, such as removing your shoes and taking your laptop out of your bag, etc.
As a Delta Air Lines passenger, you can easily integrate TSA PreCheck with your Delta app to make your travel experience even more convenient. In this piece of information, we will guide you on how to add TSA PreCheck to Delta app in a step-by-step format. However, firstly let us look at the TSA Precheck to understand what it is and why it is necessary to integrate it for a better travel experience.
Understanding TSA PreCheck

TSA PreCheck is a program developed by the Transportation Security Administration (TSA) in the United States with the aim to expedite security screenings for low-risk travelers, while providing them a hassle-free experience. By participating in this program, individuals can enjoy perks like keeping their shoes and belts on, leaving laptops and liquids in their bags, and seamlessly accessing dedicated security lanes. This in turn saves a lot of essential time for frequent flyers and eventually ensures that there are less chances of a passenger missing a flight due to the extra time consumed at security check ins.
How To Add TSA PreCheck To Delta App?

With the below explained steps it becomes easy to understand the process to enroll for TSA PreCheck to Delta app. Let’s carefully analyze each of these.
Step 1: Enroll in TSA PreCheck
Before you know how to add TSA precheck to Delta app, you need to enroll in the program. Here’s how to do it:
- Visit the TSA PreCheck website: To get started, go to the official TSA PreCheck website at https://www.tsa.gov/precheck. There, you’ll find all the information you need to enroll in the program.
- Fill out the application: Once you’re on the TSA PreCheck website, click the “Apply Now” button to begin the application process. You’ll need to provide personal information such as your name, address, and employment details, as well as identification documents like your passport or driver’s license.
- Schedule an appointment: After you’ve completed the application, you’ll need to schedule an in-person appointment at a TSA enrollment center. During this appointment, a TSA officer will interview you and take your fingerprints.
- Pay the fee: The enrollment fee for TSA PreCheck is $85, and it covers a five-year membership in the program. You can pay the fee with a major credit card.
Step 2: Obtain Your Known Traveler Number (KTN)
After you’ve enrolled in TSA PreCheck, you’ll be assigned a unique nine-digit Known Traveler Number (KTN). This number is essential when you add TSA PreCheck to your Delta app, so make sure you keep it in a secure location.
Step 3: Add TSA PreCheck to Your Delta App
Now that you have your KTN, you’re ready to add TSA PreCheck to your Delta app. Here are the steps explaining how to add TSA PreCheck to Delta after checking in:
1. Download and launch the Delta app: If you don’t already have the Delta app on your device, download it from your app store and launch it.
2. Log in to your Delta account: If you already have a Delta account, log in using your username and password. If you don’t have an account yet, you’ll need to create one before you can add TSA PreCheck to your Delta app.
3. Access your profile: Once you’re logged in, navigate to your profile within the Delta app. You can usually find this by selecting your name or profile picture.
4. Add your KTN: In the profile settings, you’ll find an option to input your KTN or TSA PreCheck information. Enter your KTN accurately and save the changes.
5. Check in for your flight: When you check in for your Delta flight through the app, you’ll see a notification confirming that you have TSA PreCheck. You’ll also see it on your boarding pass.
The aforementioned steps explain how to add TSA PreCheck to Delta flight and enjoy a faster, more convenient travel experience. So the next time you’re heading to the airport, make sure to take advantage of this great program and make your journey smoother and more stress-free.
How Do I Add My TSA PreCheck To Delta?

Getting TSA PreCheck on the Delta website is a straightforward process that can help streamline your travel experience. While selecting the TSA PreCheck, the paper or digital boarding pass includes the PreCheck indicator for TSA. On getting TSA PreCheck approval, passengers must make sure to follow the provided steps and add the TSA assigned Known Traveler ID to the profile.
Step 1: Visit the Delta website
Open your preferred web browser and go to the official Delta Air Lines website by typing “www.delta.com” in the address bar. Press Enter to load the webpage.
Step 2: Access the My Delta Account section
On the Delta homepage, look for the “Sign In” option usually located at the top right corner of the page. Click on it to proceed.
Step 3: Log in to your Delta account
Enter your Delta SkyMiles number or username and your password in the respective fields. If you don’t have an account, you’ll need to create one before proceeding. Follow the prompts to set up your account.
Step 4: Navigate to the My Profile section
Once you’re logged in, locate the profile or account settings section. This is typically accessed by clicking on your name or profile picture, often found in the top right corner of the page. Click on the appropriate option to proceed to your profile settings.
Step 5: Find the TSA PreCheck section
Within your profile settings, search for the TSA PreCheck section. This is where you can provide your TSA PreCheck Known Traveler Number (KTN) or initiate the enrollment process.
Step 6: Enter your Known Traveler Number (KTN)
If you have already enrolled in TSA PreCheck and received your Known Traveler Number (KTN), enter it in the designated field within the TSA PreCheck section. Ensure that you input the KTN accurately to avoid any issues.
Step 7: Save the Changes
After entering your KTN, click on the “Save” or “Apply” button to save the changes you made to your profile. The Delta website will then link your TSA PreCheck information to your account.
Step 8: Verify TSA PreCheck status
To confirm that TSA PreCheck has been successfully added to your Delta account, review your profile or account settings. You should see your TSA PreCheck status displayed, indicating that you are eligible for expedited screening at participating airports.
As a passenger you now know the exact process on “how do i add my TSA PreCheck to Delta” through their official website. This will enable you to enjoy the benefits of expedited security screening, making your travel experience more efficient and convenient.
How To Add TSA PreCheck To Existing Delta Flight?

Passengers with an existing Delta flight can add TSA PreCheck to their reservations by following the below stated steps:,
1. Visit the Delta Air Lines website: Open your web browser and go to the official Delta Air Lines website by entering “www.delta.com” in the address bar.
2. Log in to your Delta account: Look for the “Sign In” option, usually located at the top right corner of the page. Click on it and enter your Delta SkyMiles number or username and your password to log in to your account. If you don’t have an account, you’ll need to create one before proceeding.
3. Access your trip details: Once you’re logged in, navigate to the “My Trips” or “My Account” section. This area will allow you to manage your existing reservations.
4. Locate your flight: Find the specific flight for which you want to add TSA PreCheck. Review your trip details and ensure you have the necessary information available, such as the confirmation number or flight details.
5. Contact Delta customer support: To add TSA PreCheck to your existing Delta flight, it’s recommended to contact Delta customer support directly. You can reach them through the provided contact options on the website, such as phone support or online chat. Inform them that you would like to add TSA PreCheck to your reservation and provide them with the necessary details of your flight.
6. Follow the instructions provided: The Delta customer support representative will guide you through the process of adding TSA PreCheck to your existing flight. They may require additional information, such as your Known Traveler Number (KTN), so be prepared to provide that if applicable.
7. Confirmation and updated itinerary: After successfully adding TSA PreCheck to your reservation, the customer support representative will confirm the changes and update your itinerary accordingly. They may also provide you with a new confirmation number or any other relevant information.
Note: Adding TSA PreCheck to an existing Delta flight is subject to availability and eligibility. The customer support representative will provide you with the most accurate and up-to-date information on how to add TSA precheck to existing Delta flight?
By following these steps and contacting Delta customer support, you can add TSA PreCheck to your existing Delta flight and enjoy the benefits of expedited security screening for a smoother travel experience.
Benefits of TSA Precheck

TSA PreCheck offers a range of advantages to travelers, ensuring a streamlined and hassle-free journey. Here are the benefits you can enjoy:
Expedited Security Screening
TSA PreCheck allows you to breeze through security checkpoints quickly and efficiently. You no longer have to remove your shoes, belts, light outerwear, laptops from your carry-on bag, or 3-1-1 compliant liquids from your carry-on bag. This saves you time and reduces the stress of the security process.
Extensive Availability
TSA PreCheck is widely available, with more than 200 participating airports across the United States. It is compatible with 85 major airlines, including Delta Air Lines. This means you can take advantage of TSA PreCheck benefits at numerous airports and when flying with various carriers.
Convenience and Efficiency
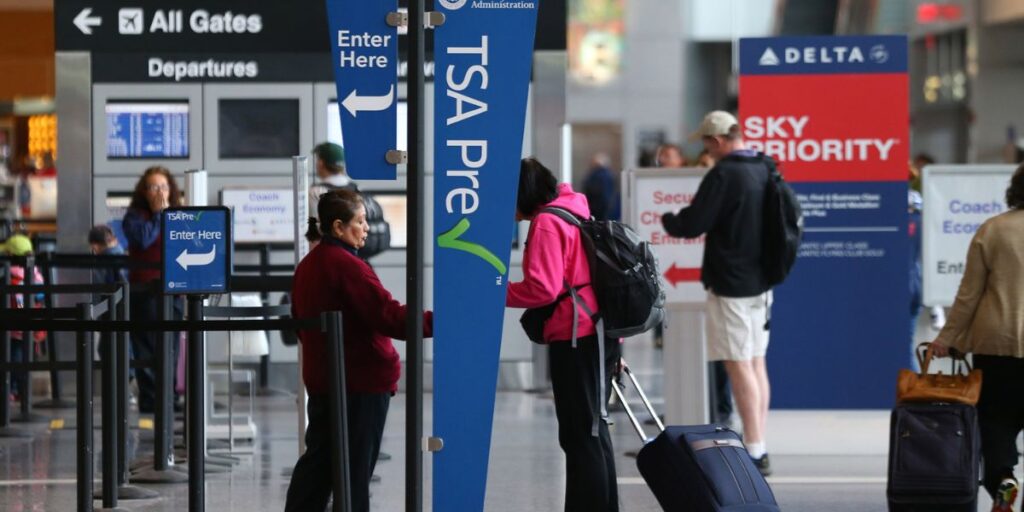
By enrolling in TSA PreCheck, you gain access to a more convenient and efficient security screening process. The dedicated TSA PreCheck lanes are typically less crowded, allowing you to move through the checkpoints swiftly. This enhanced efficiency means you can plan your travel with greater confidence, knowing that you’re less likely to encounter delays or long wait times.
Predictable Travel Experience
With TSA PreCheck, you can enjoy a more predictable travel experience. By eliminating the need for time-consuming security procedures, you can better estimate the time it takes to navigate through the airport. This allows you to plan your arrival accordingly, reducing the chances of missing your flight due to unexpected delays at security.
Thus, TSA PreCheck offers numerous benefits, including expedited security screening, extensive availability at major airports, convenient and efficient processes, and ultimately a more predictable travel experience. By enrolling in TSA PreCheck, you can enjoy a smoother and more enjoyable journey, saving time and minimizing travel-related stress.
Frequently Asked Questions (FAQs)
To be eligible, your profile information must precisely match the details listed on your TSA PreCheck/CBP Trusted Traveler application, driver’s license, or other government-issued ID.
In this case passengers can engage in a CBP Trusted Traveler Program or complete the PreCheck application program. Ensure that your profile information matches the details on your passport, driver’s license, government-issued ID, and PreCheck or CBP Trusted Traveler Program enrollment, including your middle name if applicable.
Passengers who do not meet the required standards are not eligible to participate. However, TSA implemented modified screening procedures that allow passengers who are 12 years old and younger, and accompanied by eligible travelers, to pass the PreCheck lanes.
